


What is Jenkins and why do we use it?
Jenkins is an open-source automation tool that offers an easy way to set up continuous integration and continuous delivery (CI/CD) continuous integration and continuous delivery of software.
Written in the Java programming language. It is used to implement CI/CD workflows, called pipelines.
Jenkins is Java-based and can be installed from Ubuntu packages or by downloading and running its Web application Archive (WAR) file a collection of files that make up a complete web application that is intended to be run on a server.
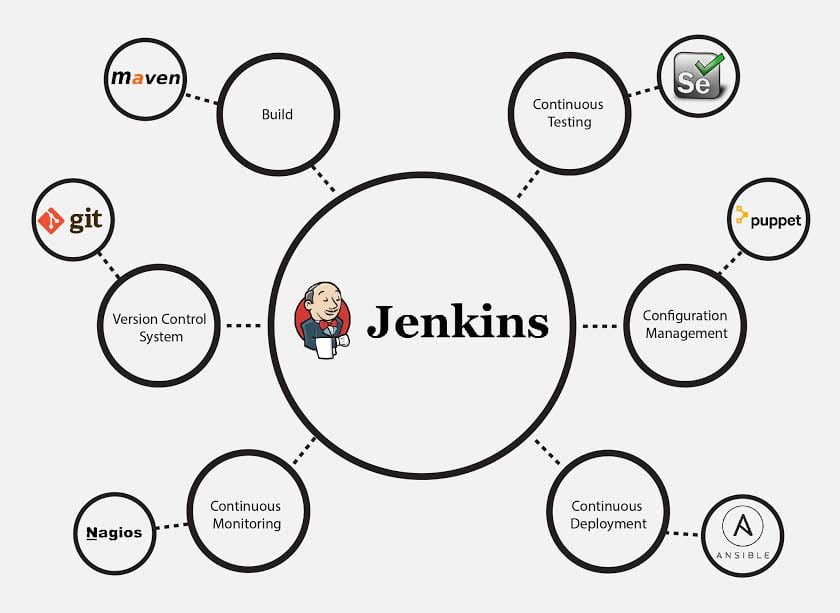
With Jenkins, organizations can accelerate the software development process through automation. Jenkins integrates development life-cycle processes of all kinds, including build, document, test, package, stage, deploy, static analysis, and much more.
Jenkins is integrating with various DevOps tools such as build tools maven and version control tools git and many more.
Prerequisites for Jenkins?
Java is the main Prerequisites for Running the Jenkins tool Jenkins requires Java 11 or 17
Jenkins Architecture
Advantages of Jenkins
It is an open-source tool with great community support.
It is easy to install.
It has 1000+ plugins to ease your work. ...
It is free of cost.
It is built with Java and hence, it is portable to all the major platforms.
Jenkins Features
Some facts about Jenkins that make it better than other Continuous Integration tools:
Adoption: Jenkins is widespread, with more than 147,000 active installations and over 1 million users around the world.
Plugins: Jenkins is interconnected with well over 1,000 plugins that allow it to integrate with most of the development, testing and deployment tools.
It is evident from the above points that Jenkins has a very high demand globally. Before we dive into Jenkins it is important to know what is Continuous Integration and why it was introduced.
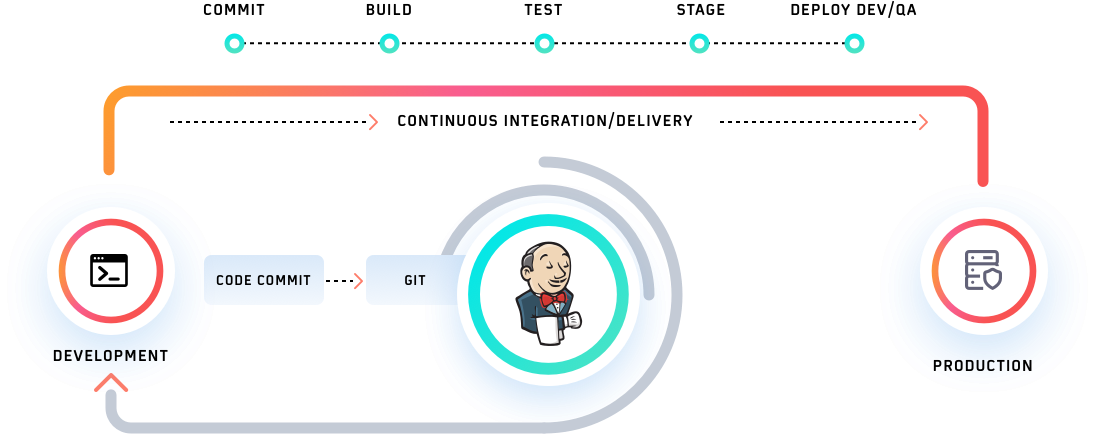
What is Continuous Integration?
Continuous Integration is a development practice in which the developers are required to commit changes to the source code in a shared repository several times a day or more frequently.
Every commit made in the repository is then built. This allows the teams to detect the problems early. Apart from this, depending on the Continuous Integration tool, there are several other functions like deploying the build application on the test server, providing the concerned teams with the build and test results, etc.
Before and After Jenkins
Before and after Jenkins

Steps to Install Jenkins on Ubuntu Server.
Launch Ubuntu or any other Linux distribution system.
connect the server using third-party tools such as Putty, Git-bash or MobaXterm.
update the server using the below command
$ sudo yum update –y
Add the Jenkins repository using the following command
$ sudo wget -O /etc/yum.repos.d/jenkins.repo
pkg.jenkins.io/redhat-stable/jenkins.repoImport a key file from Jenkins-CI to enable installation from the package
$ sudo rpm --import pkg.jenkins.io/redhat-stable/jenkins.io-202..
$ sudo yum upgrade
install java 11 or 17 and install Jenkins.
$ sudo amazon-linux-extras install java-openjdk11 -y
verify the java version
$ java --version

install Jenkins
$ sudo yum install jenkins -y
Enable the Jenkins service to start at boot
$ sudo systemctl enable jenkins
Start Jenkins as a service
$ sudo systemctl start jenkins
You can check the status of the Jenkins service using the command:
$ sudo systemctl status jenkins

Unlock the Jenkins
Unlock the Jenkins using Jenkins AdminPassword


- install the suggested plugins


When the installation is complete, we'll be prompted to set up the first administrative user. It's possible to skip this step and continue as admin using the initial password we used above, but we'll take a moment to create the user.

Once the first admin user is in place, you should see a "Jenkins is ready!" confirmation screen.

Finally, the Jenkins Dashboard looks like this

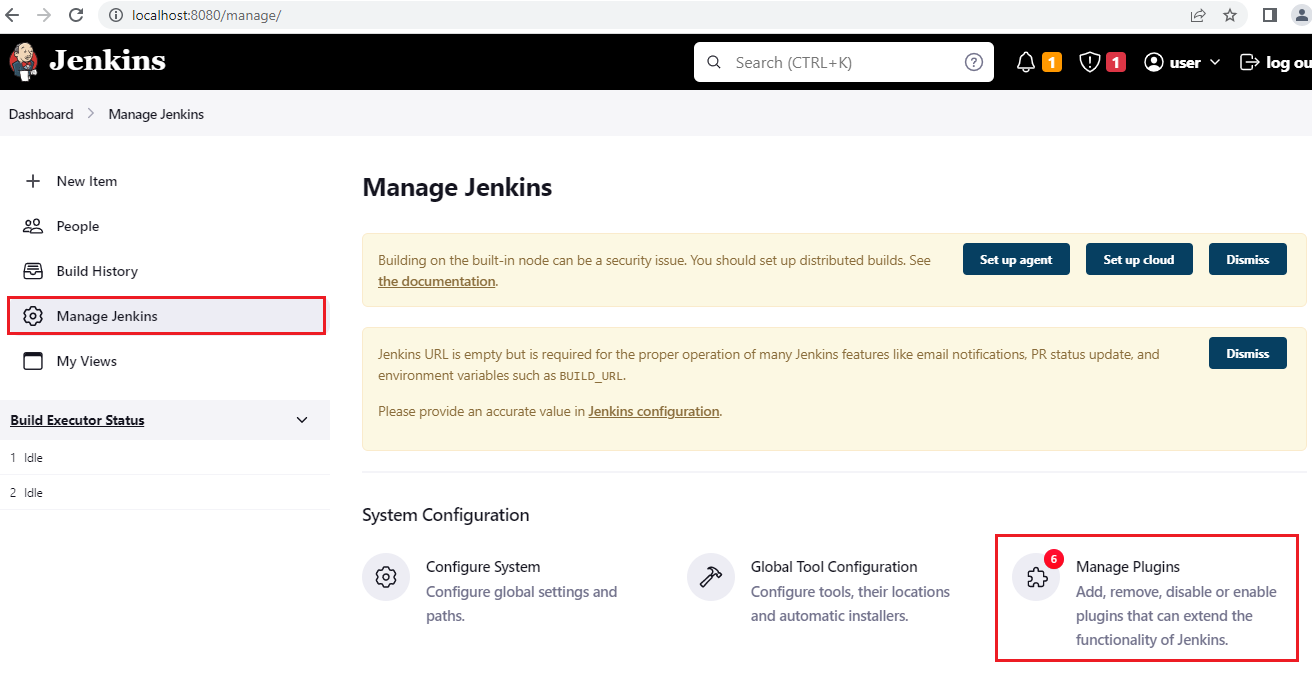
Installing and Configuring Plugins
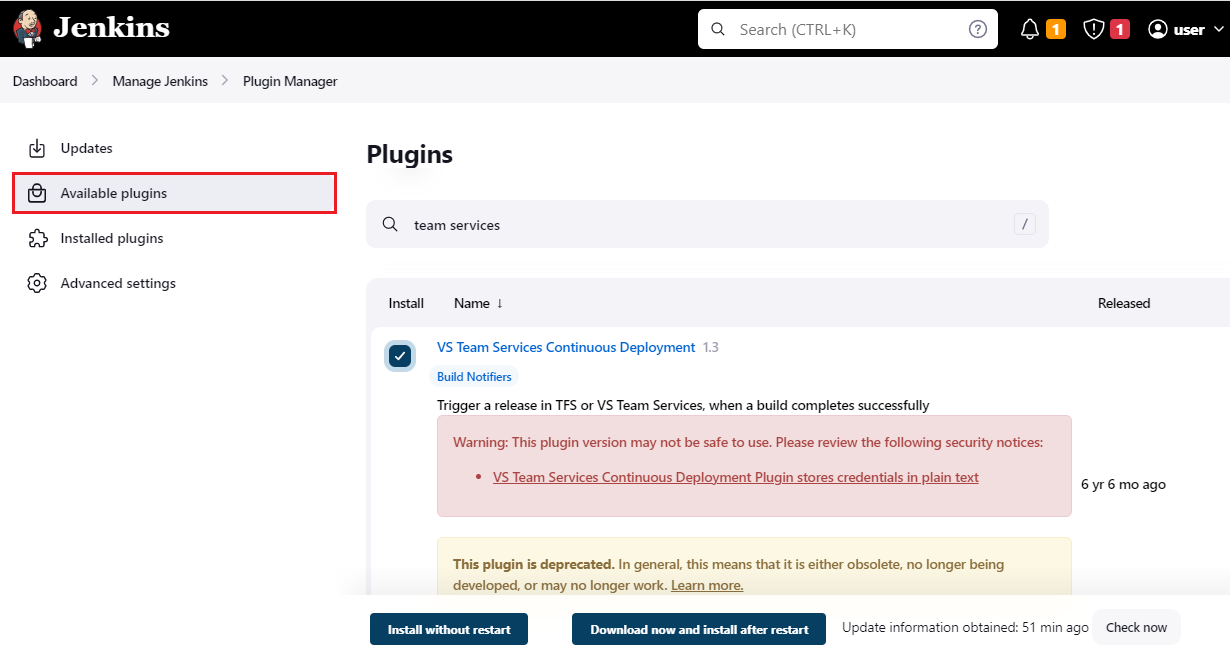
Click Manage Jenkins on the Jenkins home page and select Manage Plugins. Select the Available Plugins tab and search for team services
Select VS Team Services Continuous Deployment plugin and select Install without restart
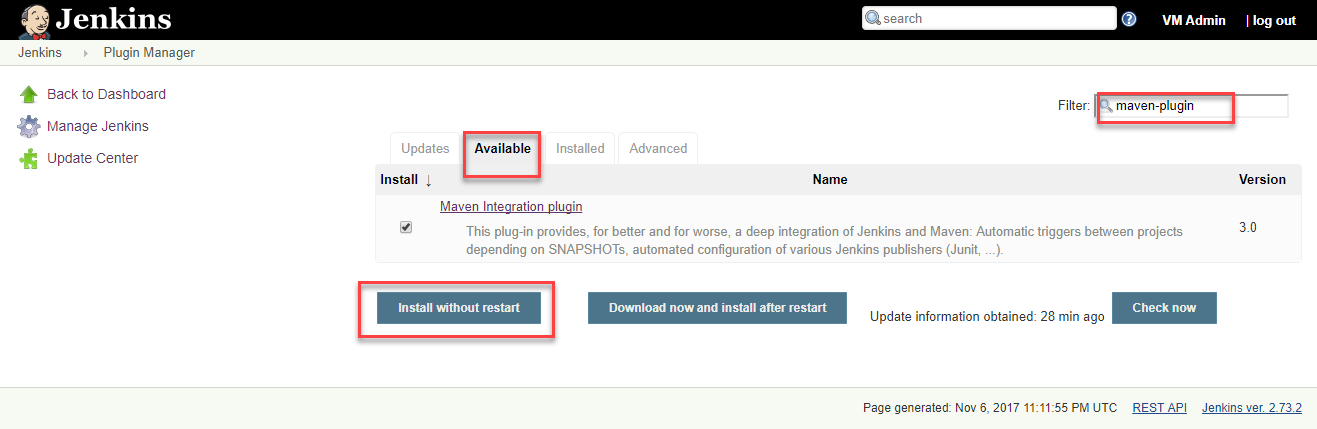
Select Manage Plugins, select the Available tab and search for maven-plugin
Select the Maven Integration Plugin and select the Install without restart button to install the plugin.
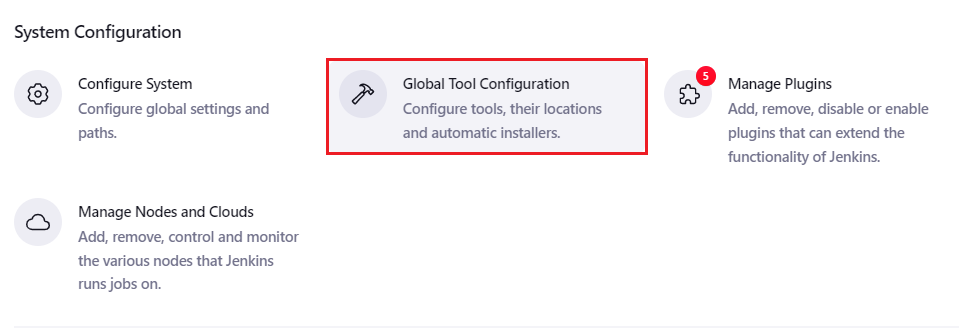
Once the plugin is installed, go back to Manage Jenkins and select the Global Tool Configuration option.
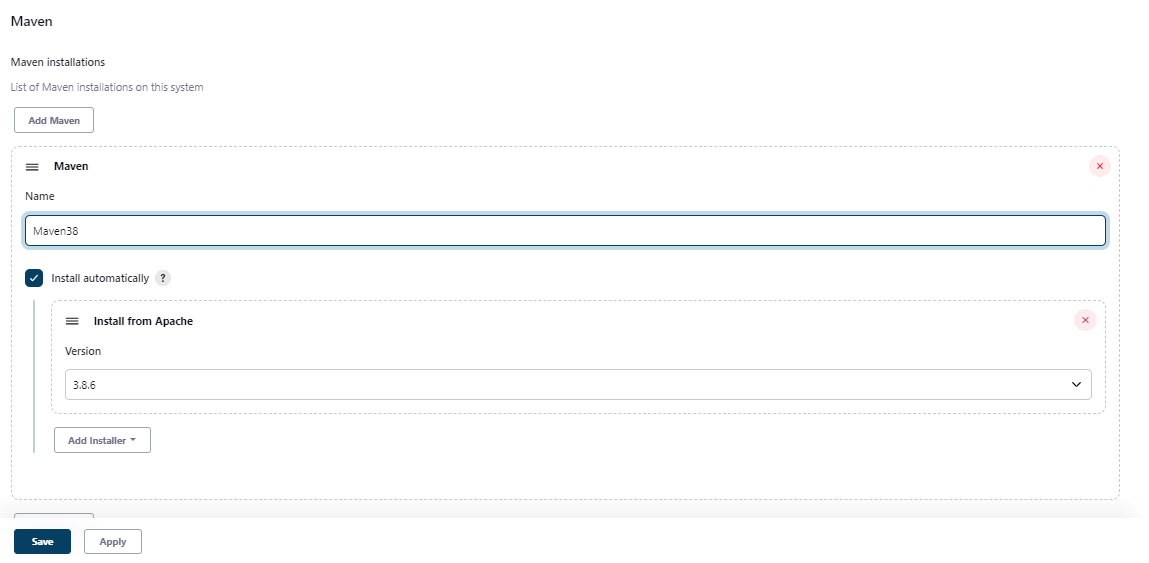
To install Maven, go to Maven section and click on Add Maven option and provide a name. Then select the Apply button. The latest version of Maven at the time of writing this lab is 3.8.6
From the Jenkins home page, click on the New Item link. Provide a name for the build definition, select Maven project and click OK.
Maven Project Creation

navigate to the newly created project click on configure under the general's tab provide the repository URL

the Source code Management section. Select Git and provide the clone URL


under the Build section and provide the text package -DskipTests=true in the Goals and options field.

Once the build is complete, you can specify what action you want to take. For instance, you can archive the build artifacts, then deploy them directly to the target environment We will choose the Archive the Artifacts option in the Post-build Actions.
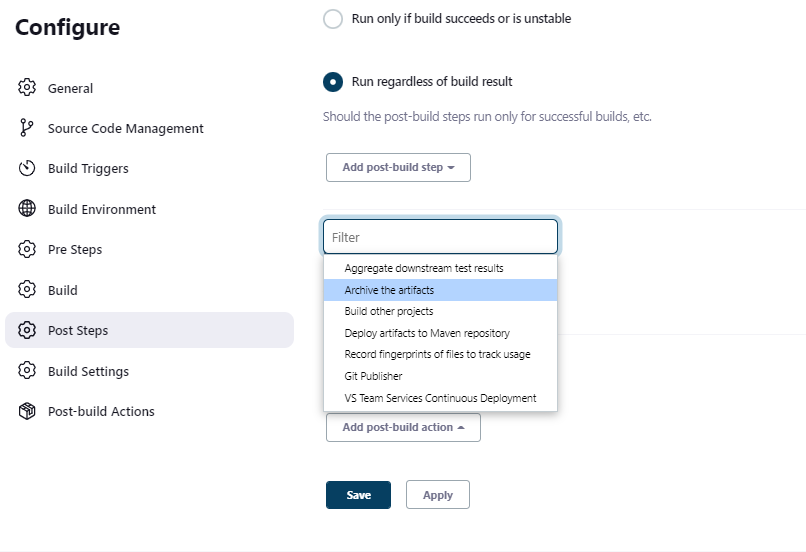
Enter target/*.war, *.sql in the Files to archive text box. Select the Save button to save the settings and return to the project page.

The configuration is now completed, Select the Build Now option to initiate an Ad-hoc build. The build progress will be displayed on the left pane in the Build History section

To view the build details and the list of build artifacts, select the build number displayed in the Build History section.

click on the console output to see the detailed build logs.

if the build job is a success we can get the build Artifacts
we can use those build Artifacts in the continuous Delivery stage

Thanks for Reading my blog... :)